
What's up Pokémon lovers!?
Before reading today's blog post (or scrolling down to the pictures) you need to listen this song :D
Today's theme on Nail art Sunday is "My first nail art". The idea is that you choose your first nail art posted on your blog and redo it. Only problem is that my first nail art on the blog is this one. So that wouldn't be that much to recreate since it's only one month old. Instead I decided to redo the first nail art I uploaded on my Instagram. I know that the picture isn't great but I hope you get the idea :) I did this nail art for a sci-fi exhibition my boyfriend and I went to last spring. I remember being super pleased with the result ^_^
As you can se, hopefully, I did pokémon balls :D It took me such a long time to do them. I didn't have any dotting tools or nail art brushes and I remember it being SO hard to get nice thin lines that separated the red and white nail polish.
 |
| Picture taken from my instagram @cilp |
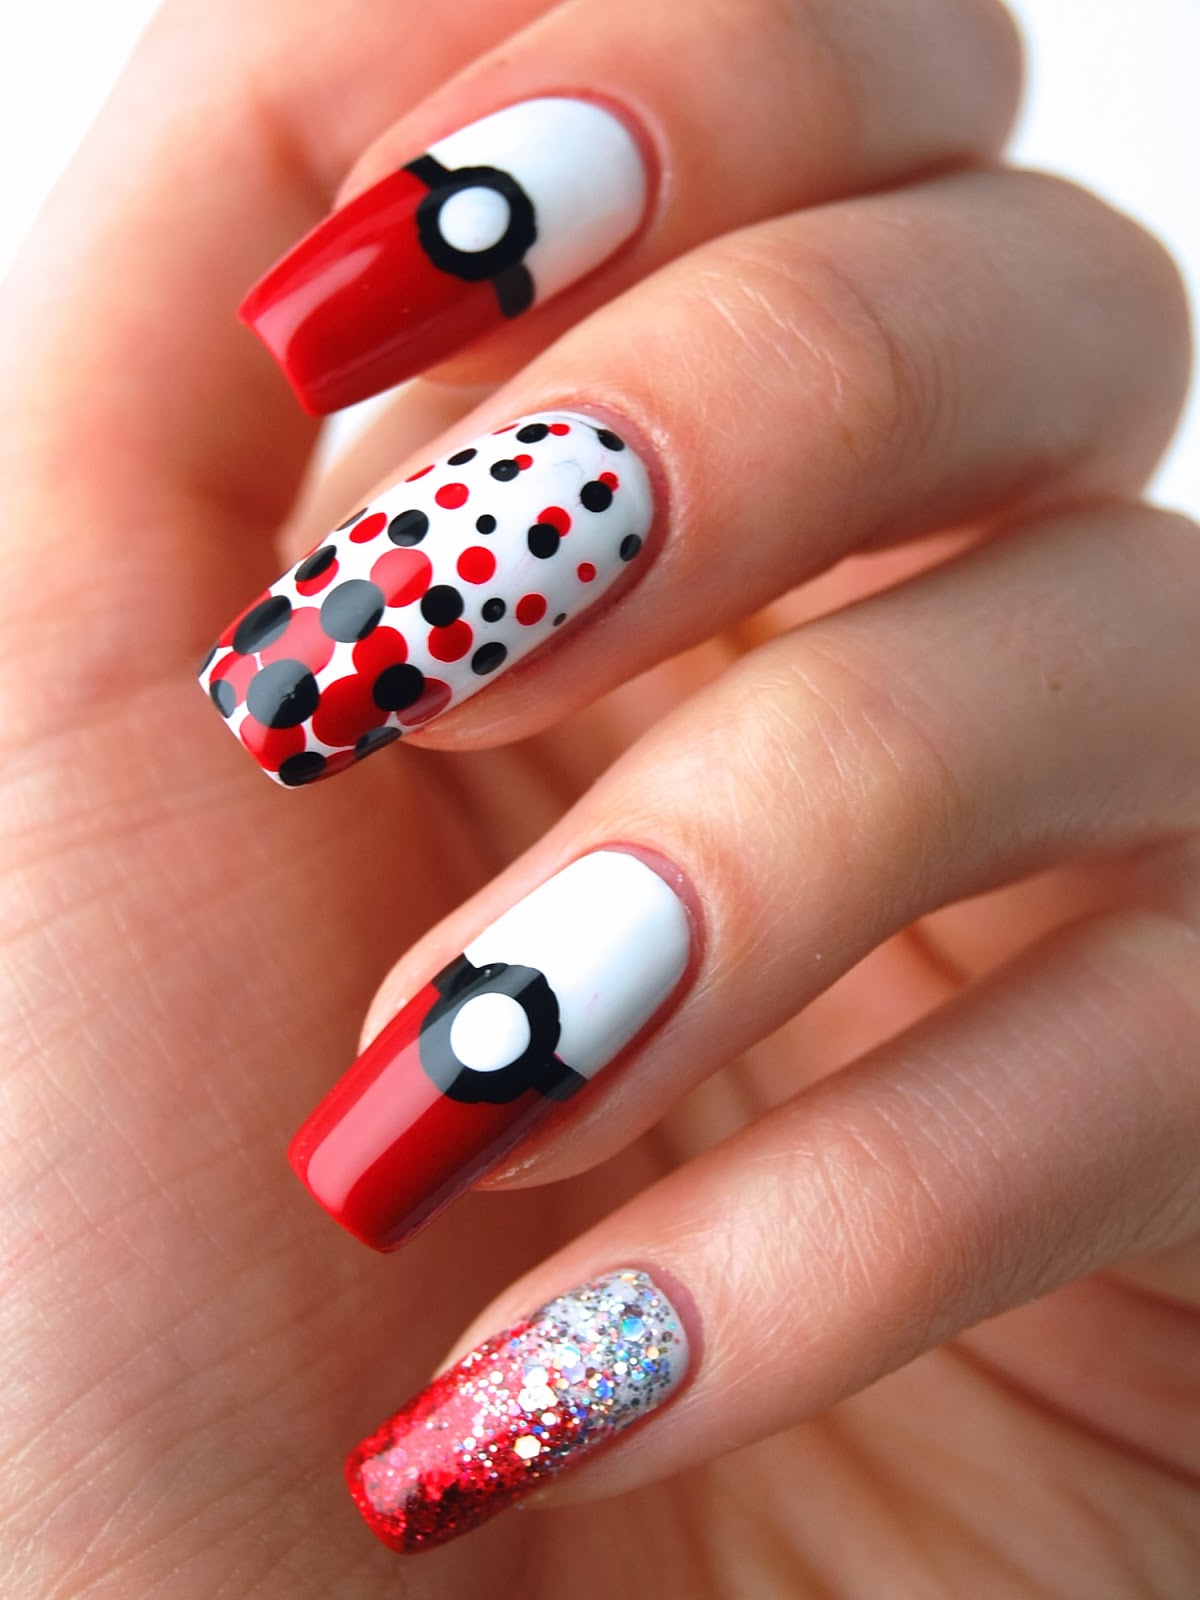
And now time for the improved version of this mani! I decided to let the nail art evolve. Do you get it, evolve. Since it's a PKMN mani... Hehe... Okay I'm sorry, I promise I won't do that again. Ever.
Okay, focus. Polishes I have used are:
White = Nordic Cap NP13, Black = Nordic Cap NP12, Red = OPI - Over & over a-gwen.
Silver glitter = Darling Diva Polish - Sting ray, Red glitter = Darling Diva Polish - Little red corvette.
The nail art tools I've used are dotting tools and a nail art liner. That really does take you a long way. I started of with three thins coats of white polish as the base colour for all my nails. On my middle finger I did red and black dots in different sizes. Unfortunately when I applied SV it did smudge the dots a little bit but it wasn't to bad.
On my pinkie I applied one coat of silver glitter and dabbed the the red glitter on half the nail to get a nice fade effect. The Pokémon balls where pretty simple. I painted the outer half of my nail red. When the red polish was kind of tacky I used the nail art liner with black polish to separate the two colours. Then I added a big black dot and after that a smaller white dot in the middle of the black one. I waited a really long time before adding TC to avoid any smudging.


I really liked this theme. I often feel like haven't improved my nail art skills. This theme really showed that I have. I love the theme weeks the most. So I'm hoping there will be more themed nail art Sundays and less weeks with free choice.
Until next time, take care!
/Christina
Alltså WOW vad snyggt! *kär*
ReplyDeleteTack snälla :) Det var en väldigt rolig nail art att göra ^_^
DeleteSuperfint! Jag har typ noll koll på pokemon men känner att detta gör mig lockad att fördjupa mig ;)
ReplyDeleteJag beordrar dig att börja spela Pokémon :D
DeleteRiktigt snyggt! Och vilken utveckling, både vad gäller nail art och bildkvalitén.
ReplyDeleteSååå snyggt...nu ;)
ReplyDeletePikachuuu! Så duktig du blivit på kort tid! Imponerande och snyggt! :-)
ReplyDeleteSå snyggt och kul!!!
ReplyDeleteWow! Vilken skillnad! Älskar långfingernageln!!
ReplyDeleteTack :) Det var min sambos favorit också :P
DeleteJäklar i min lilla låda vad snygg den blev! Snacka om att göra framsteg:)
ReplyDeleteTack :) Lite skillnad är det allt ;)
DeleteJAG ÄLSKAR POKÉMON!!!! Och fyller dessutom år idag! Så det här blev nästan en födelsedagsmanikyr åt mig....?? ;) Haha. Nä. Kram!
ReplyDeleteGrattis i efterskott, klart den var till dig ;)
DeleteSå SJUKT snyggt. Du är så himla duktig och du borde definitivt visa mer nail art! Fattar inte hur du fick till de stora runda cirklarna så bra. Har du använt en dotter för det eller penslat? Jag har försökt mig på stora dots ibland och det blir ju inget bra :(
ReplyDeleteJag använde min största dotting tool. Jag tycker också att det är riktigt klurigt och trodde inte att jag skulle reda ut det. Jag såg till att doppa "pluppen" många gånger i lacket innan jag gjorde pricken. Jag försökte att cirkulera runt för att få en mjuk ytterkant. Vet inte om förklaringen var toppen. Kan försöka göra en tutorial någon gång :)
Delete