Showing posts with label Nordic Cap. Show all posts

2.4.14

Pikachu nail art

I wasn't suposed to use these yet! I'm like a child when it comes to nail art stuff. I can't have it at home without using it immediately. The same rule applies for candy :P

These decals where sent to me from BPS to review. I really wish that they had other pokemon decals as well, but these where the only ones I could find. Pikachu is adorable and I love the concept so I would love it if there where more pokemons to choose from. I'm a huge PKMN fan, the first game I played was PKMN Gold for Game Boy Color. I also love the older anime. Not a big fan of the newer series but I play the newer games whenever I have some spare time. 

Enough babbling, time for the review. These water decals are meant to be put on the tip of your nail like a french Pikachu mani :) I decided to go with a white base. I had to trim the decals for my pinkies, but that was super easy and no big problem. These decals where a bit harder to apply than the smaller ones I've tried before. I noticed that it's necessary to use a blow dryer on them to make them follow the shape of the nails. After the blow drying I applied one coat of TC. The TC helped to smoothen out the decals. I'm trying a new TC atm, from Glisten & Glow, and it works great with water decals and nail arts.  

If you don't know how to apply water decals you can check out my tutorial :) Click here!
I'm overall really pleased with the result and I like these decals a lot. There are tons of other designs with flowers and such if you like the funky french concept. I do and I'm definitely going to try some of them out in the future. 
Until next time, take care!
/Christina

9.2.14

Nail art sunday - Prettypots Polish swatch

Hi lovelies!

I've got  pretty simple nail art to show you for todays nail art Sunday. Made with polish from some pretty cheap brands I tried a different type of swatch today. I really like swatches that aren't just "plain polish swatches" so I decided to try it out myself. On my middle and ring finger I'm wearing Prettypots Polish - Candy peach. A peachy pink shimmer creme with pink, purple and blue glitters. I choose a couple of polishes that matched the glitters and the base colour of Candy peach and tried a few different techniques.

The colours that I used are Mavala - Samarkand, H&M -Nail him, H&M - Check me out and Nordic Cap - NP14.

On my index finger I simply applied layers of the different colours, starting with the lightest one and ending with the darkest. Then I finished it of with three big pink dots.

On my pinkie I started with a purple base and painted horizontal sloppy lines with the help of a nail art brush.

On my thumb, that you can see in one of the pictures I used a dotting tool and added a few studs in some of the dots.

None of these techniques are particularly tricky, but the end result looks kind of impressive :)


Until next time, take care!
/Christina

29.1.14

Valentine's day contest

Hey cuticle cuties!

So I have realised that not all of you love Doctor Who as much as I do. Teherfore I decided to post a non DW post :) I was on IG a couple of hours ago and saw that Polish alcoholic is having a valentine's day contest together with Luchessa. I though it would be fun to participate, and so should you guys :) 

I've used the following polishes:
Pop Culture Cosmetics: Pink drink, Red carpet and Magical valentine , CbL - Leather & Lace, Mavala - London, Orly - Beach cruiser and Nordic cap - NP13 (basic white). 

From index to pinkie, this is how I did the manicure.

My index finger is a two coloured ombre. Closest to the cuticle I have Red carpet and at the free edge I have Pink drink. I blended the two colours by slightly overlapping them. With the help of an orange stick I placed out red and pink sequins in a relatively straight line. 

On my middle finger I started of with a white base, then I placed red caviar beads as a heart shape and added pink caviar beads in it. I didn't feel completely satisfied so I applied my CbL holo TC around the heart. 

I love glitter gradients so that was pretty much a must-have for this mani. As base I used a hot pink and when it was dry I dabbed on the valentine glitter.

I thought I needed more hearts so I decided to give my pinkie some love. Starting of with a white base I used a dotting tool to create a big red heart. Around it I added dots in different pinks and reds. Finally I placed a pearly white heart glitter in the middle of the red heart.  

That's all for now :) I hope you enjoy the pictures.


This picture is taken with flash so you can se the holo TC in action :)

Until next time, take care!
/Christina

27.1.14

Pop Culture Cosmetics - Roller coaster after dark

Not time for friendly hellos, LOOK AT THIS POLISH!

This magical polish miracle is Roller coaster after dark from Pop Culture Cosmetics. RCAD is a blackened grey jelly with prismatic shimmer and tons of glitter. When you buy this baby you get moon and star shaped glitters, squares and circles! The glitters come in all the colours of the rainbow. Some of the colours are magenta, silver, gold, green, blue, orange and red. You can buy PPC-polishes here.

The formula is amazeballs! No fishing , not even for the large circles, was required. I wasn't sure about the opacity of RCAD so I decided to layer it over a black polish. On the pictures I have one coat of the cheap black polish from Nordic Cap, two coats of RCAT and two coats of SV. This polish is crazy awesome and it's not similar to any other polish in my collection. 

What do you guys think? Do you like it? 
I couldn't control myself with the camera. Sorry about the picture spam lol!

Until next time, take care!
/Christina

19.1.14

Nail art Sunday - My first nail art

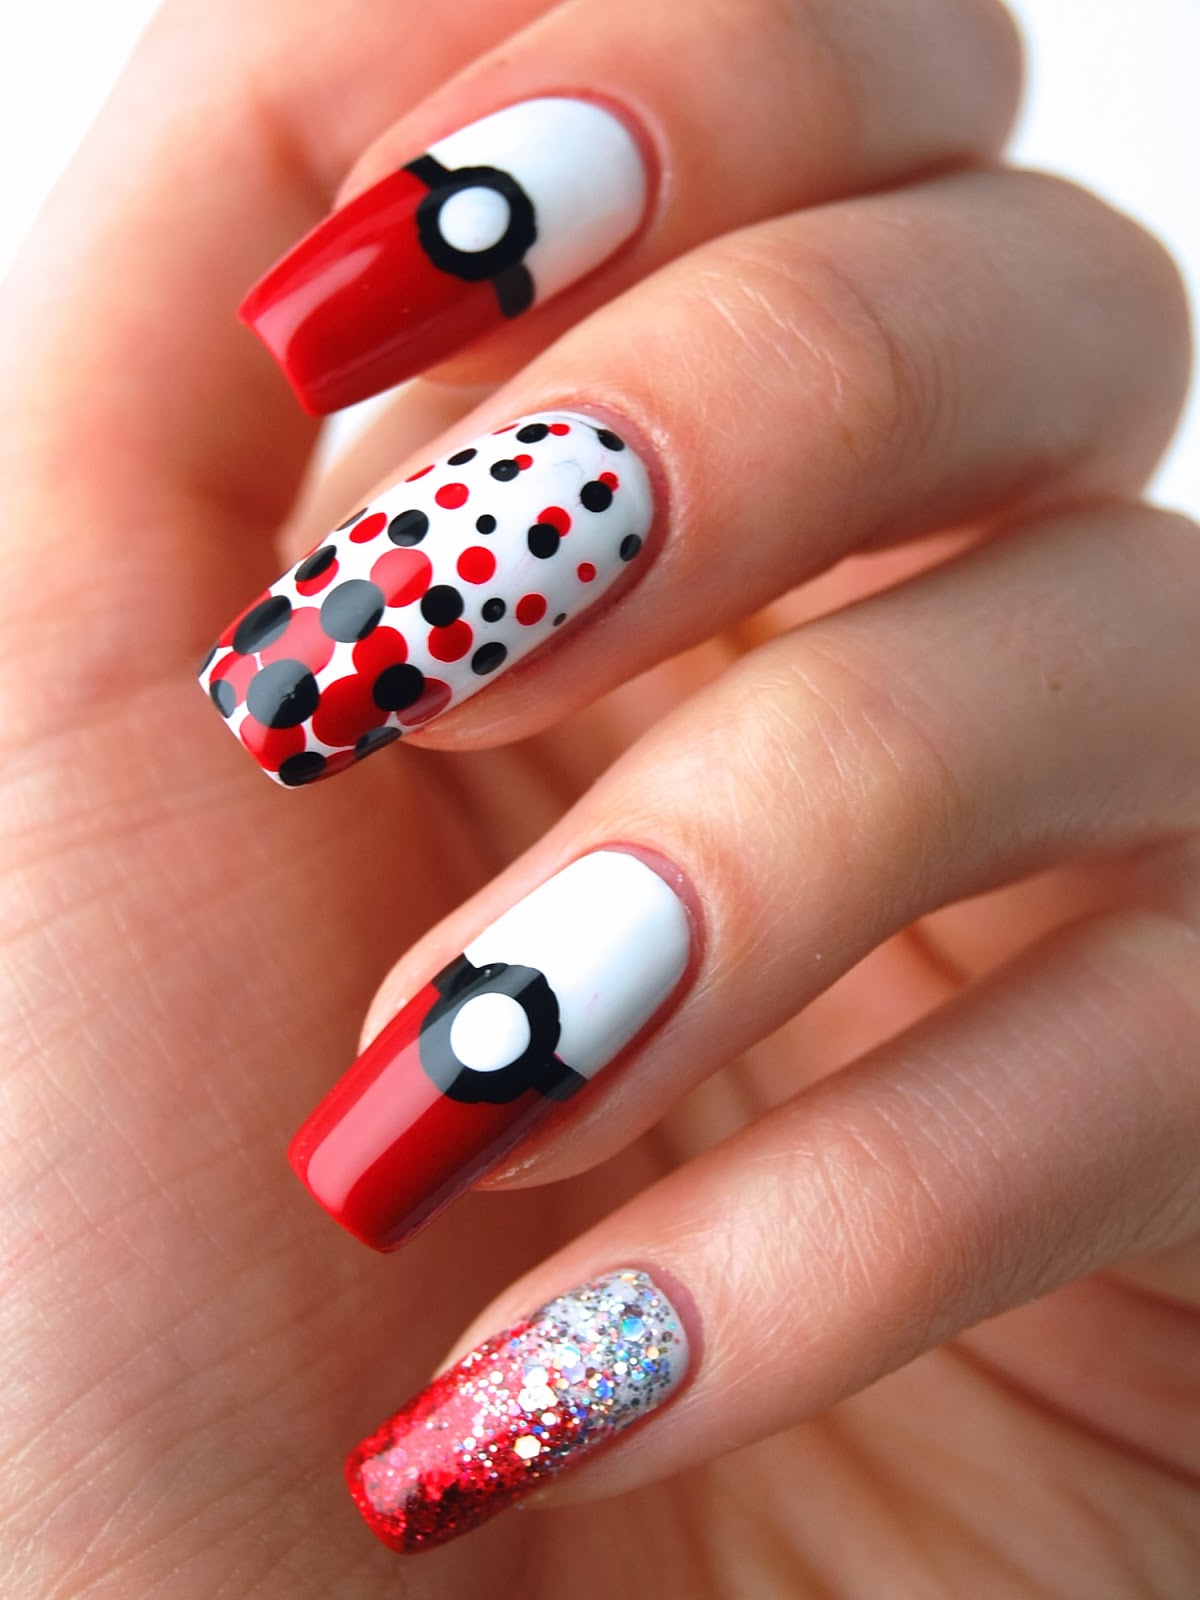
What's up Pokémon lovers!?

Before reading today's blog post (or scrolling down to the pictures) you need to listen this song :D

Today's theme on Nail art Sunday is "My first nail art". The idea is that you choose your first nail art posted on your blog and redo it. Only problem is that my first nail art on the blog is this one. So that wouldn't be that much to recreate since it's only one month old. Instead I decided to redo the first nail art I uploaded on my Instagram. I know that the picture isn't great but I hope you get the idea :) I did this nail art for a sci-fi exhibition my boyfriend and I went to last spring. I remember being super pleased with the result ^_^ 

As you can se, hopefully, I did pokémon balls :D It took me such a long time to do them. I didn't have any dotting tools or nail art brushes and I remember it being SO hard to get nice thin lines that separated the red and white nail polish. 
Picture taken from my instagram @cilp

And now time for the improved version of this mani! I decided to let the nail art evolve. Do you get it, evolve. Since it's a PKMN mani... Hehe... Okay I'm sorry, I promise I won't do that again. Ever. 

Okay, focus. Polishes I have used are: 
White = Nordic Cap NP13, Black = Nordic Cap NP12, Red = OPI - Over & over a-gwen.
Silver glitter = Darling Diva Polish - Sting ray, Red glitter = Darling Diva Polish - Little red corvette.

The nail art tools I've used are dotting tools and a nail art liner. That really does take you a long way. I started of with three thins coats of white polish as the base colour for all my nails. On my middle finger I did red and black dots in different sizes. Unfortunately when I applied SV it did smudge the dots a little bit but it wasn't to bad. 

On my pinkie I applied one coat of silver glitter and dabbed the the red glitter on half the nail to get a nice fade effect. The Pokémon balls where pretty simple. I painted the outer half of my nail red. When the red polish was kind of tacky I used the nail art liner with black polish to separate the two colours. Then I added a big black dot and after that a smaller white dot in the middle of the black one. I waited a really long time before adding TC to avoid any smudging.  
  

I really liked this theme. I often feel like haven't improved my nail art skills. This theme really showed that I have. I love the theme weeks the most. So I'm hoping there will be more themed nail art Sundays and less weeks with free choice. 

Until next time, take care!
/Christina

14.1.14

365 Days of Color - Horcrux collection

Hello muggles!

I have a wonderful collection to show you today. It is TO DIE FOR. Litterally, Voldie... I mean He-who-must-not-be-named died because of these. Oops SPOILER ALERT :P I was really pleased with the delivery time. I ordered this collection on the seventh of January and received it today. I think that's pretty impressive. First some random mumbo jumbo. All polishes are swatched without base and top coat. When it comes to formula I was really pleased with all of them, no problems whatsoever. The bottle and brush are the classic indie type. I really like that brush, it's pretty small and works great for me. 

About the collection. It consists of seven polishes, duh :P Two jellies with glitter, two glitter toppers, two full coverage polishes and one shimmer topper. Besides the polishes in the collection I have also used Nordic Cap - NP12, OPI - Moonraker and Essie - Borrowed and Blue. Okay, enough babbling time for some swatches!

Btw I have them listed in the order they where destroyed. Did you really expect anything else?
The Diary
First out is The Diary. This is a beautiful grey jelly with dark grey prismatic glitter. I have applied two coats over one coat of Moonraker. I am a big fan of grey polishes and this one was no exception. I think it's stunning!

The Ring
Next out is The Ring. I have on coat layered over The Locket and I love this combination. I usually don't go for colours like this but I'm definitely going to broaden my horizon. It's a calm colour but with a twist and I think it works pretty well with my skin tone.

The Locket
This is The Locket on it's own. A warm olive green metallic polish. The formula of this one was magical. It applied just like butter. I needed three thin coats to achieve full coverage. 

The Goblet
The Goblet is a classic golden topper. I have a few similar so I wasn't super excited about this one but it's a nice topper. Easy to apply and the glitter spread evenly. I have one coat over The Snake. 

The Diadem
This is one of my favourites. The Diadem is soft glitter topper. The mix of blue, gold and silver really works for me. The glitter application was easy with this one as well. No problems whatsoever. I have two coats over Borrowed and Blue. 

The Boy Who Lived
"Harry Potter, the boy who lived. Come to die. AVADA KEDAVRA!". Need I say more? Best scene ever. This polish is Harry Potter for me. His black hair and his mother eyes. It's just brilliant. I have two coats over one coat of NP12.
The Snake
The Snake, what a finally! Grass green cream polish with wonderful golden shimmer. Nagini would have loved to wear this. Well... that would require nails. Snakes don't have nails. But still. Two coats, applied like smooth snake venom. Err. Never mind. 

I LOVE THIS COLLECTION! Enough said. If you also love it you can order it here for 56 USD. This is my first HP collection but definitely not my last.

Until next time, take care!
/Christina